Lightweight hypertufa planters are a popular DIY project.
I first came across these planters from My Vintage Porch and Jenna Sue Design.
The planters looked so rustic and ancient, and I loved the idea of being able to custom design your own planter.
Hypertufa is basically a lightweight form of concrete.
There are many variations of ingredients you can find online, but the traditional ratio is 1 : 1 : 1 of Portland cement, Perlite or Vermiculite and Sphagnum Moss, Peat Moss or Coconut Coir.
For this particular planter, I wanted to experiment with using Untreated Sawdust in place of the Moss or Coconut Coir. I also wanted to try using a slightly lower ratio of Portland Cement.
So with this planter I used a ratio of 2 : 3 : 3 Portland cement, Perlite and Untreated Sawdust.
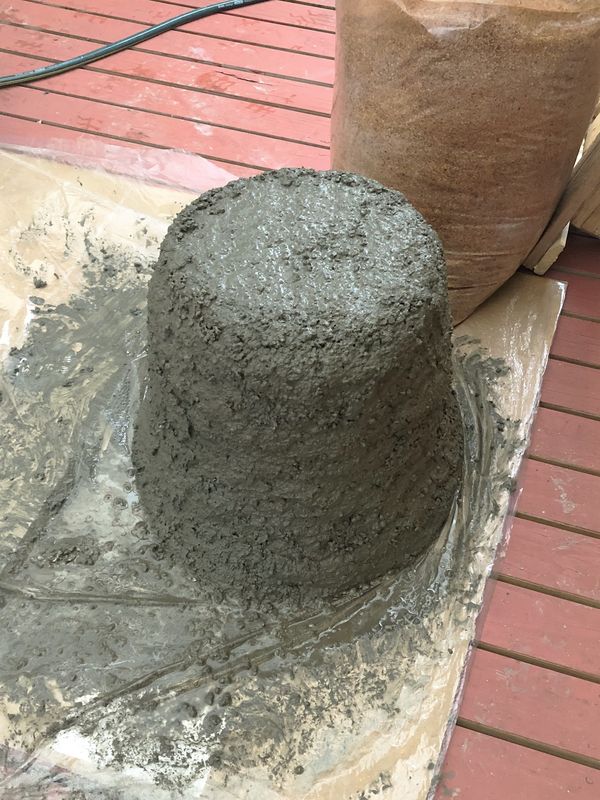
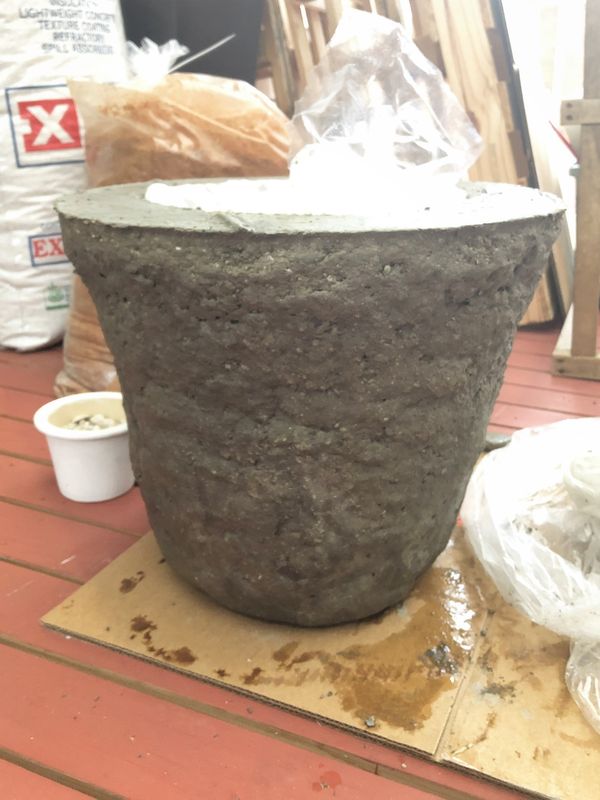
Normally, the hypertufa mix is placed inside a bucket to create the shape, however, for this project, I wanted to do try something different. Instead I used the outside of a bucket, placed upside down, to create the shape of the planter.
This method is definitely more difficult and requires more handling, so for a beginner I would recommend using the inside of a bucket to create your planter.
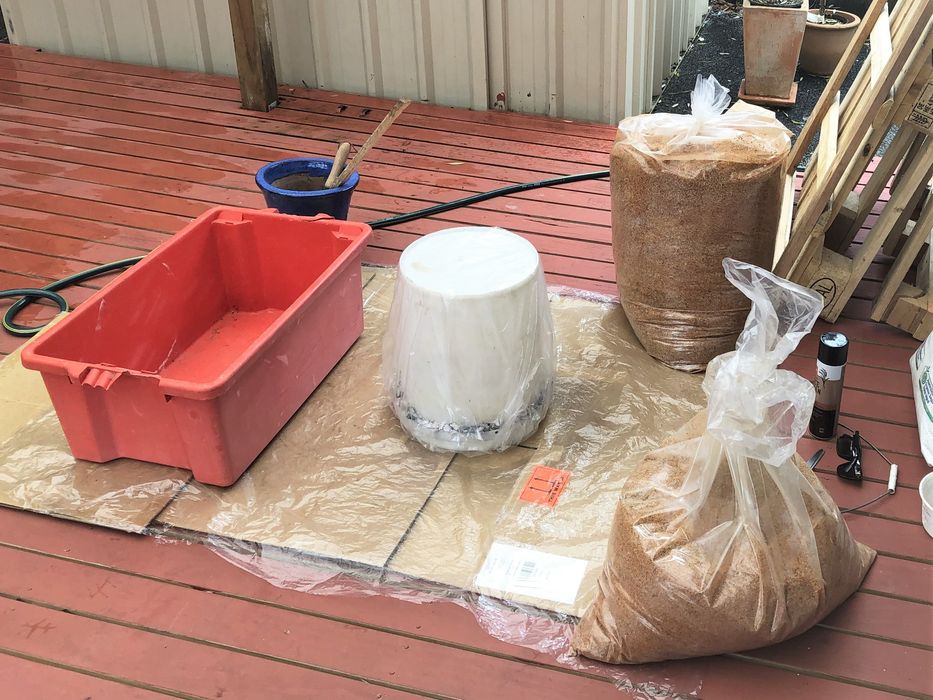
Materials Used
- Plastic ground sheet or cardboard
- Bucket
- Plastic sheet or liner x 2
- Tape
- Cooking spray
- Strong rubber gloves
- Dust Mask
- Safety glasses
- Large mixing tub
- Mixing trowel
- Smaller container for measuring portions
- Portland Cement
- Untreated sawdust
- Perlite
- Water
- Masonry drill bit
- Drill
Safety Tips
Perlite can give off a fine dust powder when handled, and Portland cement is highly alkaline and can damage skin and airways, so always use a good quality dust mask, safety glasses and strong rubber gloves when handling and mixing.
Whichever tub you mix the ingredients in, any leftover cement may harden and set onto it, so clean it thoroughly, or use something that you don’t mind getting dirty.
Process
Prepare your work space by lining it with a plastic drop sheet or thick cardboard. Bear in mind that any cement mix that drops onto any surface will harden and may be difficult to remove once its dry. So be sure to create a large work space for yourself, or clean any spills quickly before the cement sets.
For this upside down bucket method, I wrapped the bucket in plastic and sealed in any undercuts with stuffed paper. This prevents the cement mix from hardening into the grooves, making it easier to remove.

Spray the outside of the plastic with cooking oil spray. This makes the bucket easier to remove once the cement has set.
Prepare all your personal safety equipment like safety glasses, dust mask and rubber gloves.
Using a smaller measuring container or bucket, measure out portions of sawdust, perlite and cement according to whichever ratio you choose. For this planter I used a ratio of 2 : 3 : 3 of cement to perlite to sawdust. Mix the dry ingredients together.
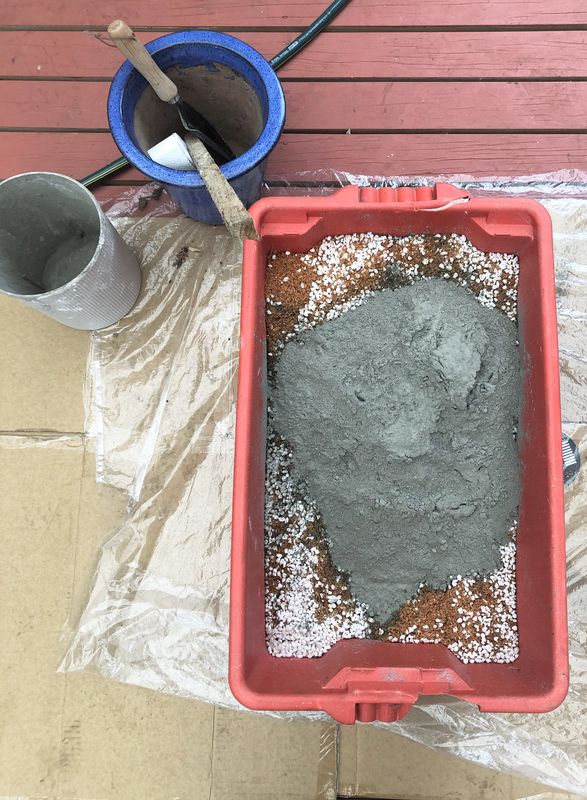
Slowly add water until it forms a thick clumpy consistency (not too runny and not too dry). You should be able to hold it in your hands, squeeze it into clumps and it should hold its shape.
Shape the mixture around the bucket, starting from the base and building it up along the sides. Try to get the sides as even as possible. Be sure to keep the top as level as possible, as it will eventually form the top rim of the planter and should be horizontal.
Wrap and cover the upside down planter in plastic for 2 days. Uncover the plastic after 2 days and check the shape. Since the cement mix should be harder and more solid now, it is a good time to fill in any of the sides if it is uneven or patchy.
Then re-wrap the planter in plastic and keep fully sealed in a shaded place for 1-2 weeks. Theoretically the longer the setting time the stronger the planter should be.
After those 2 weeks, unseal the plastic and remove the planter from the bucket. The planter will look darker initially, but as it air dries it will lighten considerably.

As the planter air dries over a few days, the remaining water will evaporate and the planter will be lighter in weight and colour.
Lastly, drill drainage holes if this planter is being used for living plants. I used masonry drill bits from an affordable drill bit set from Bunnings NZ.
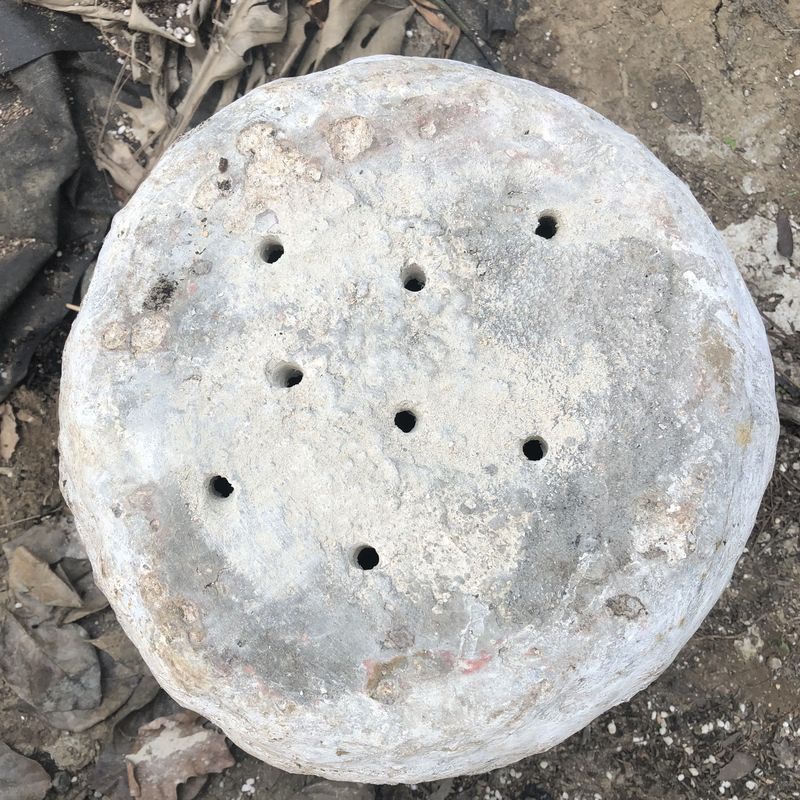
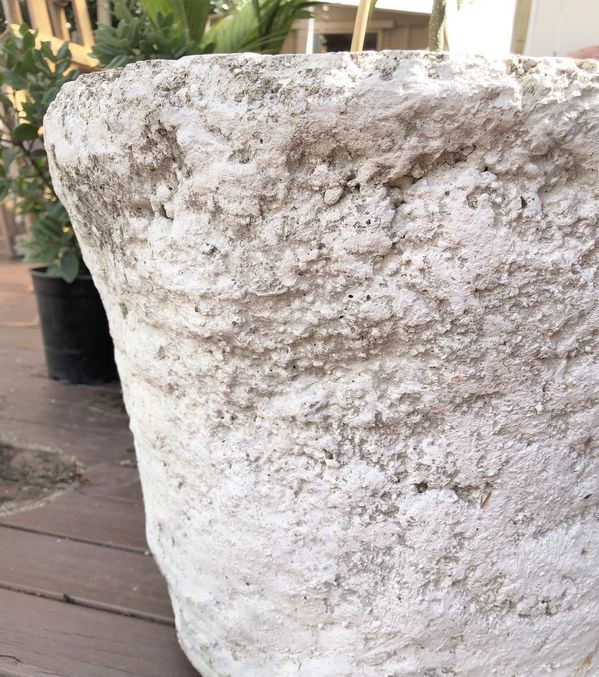
This planter came to about 40 cm high and 40 cm wide at the top.
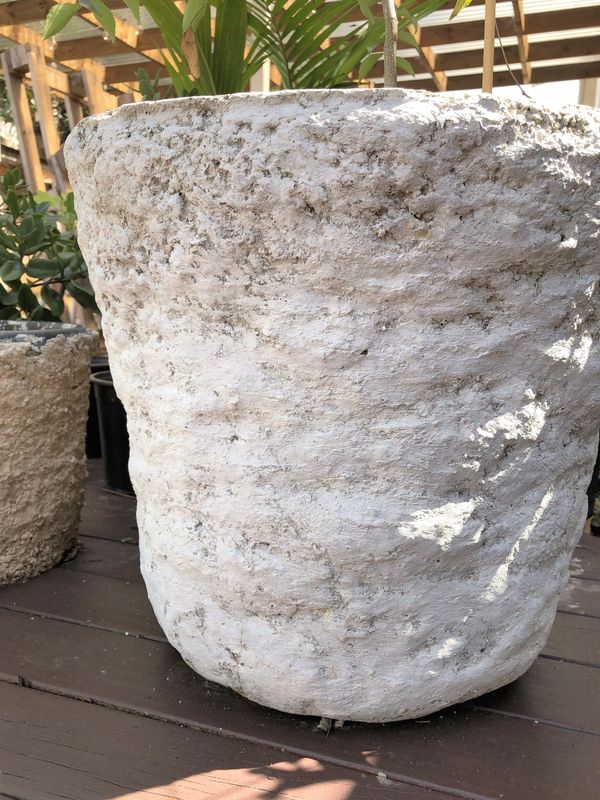
Love the worn aged texture of the surface. Beautiful.